
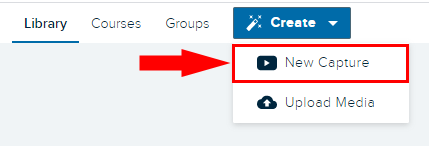
- To record with Echo360 Universal Capture, launch the Universal Capture software from your computer’s Desktop or programs menu. Alternatively, click the “Create” button and choose New Capture from within the Echo360 portal or from within your Blackboard course. If prompted to launch the Echo360 application, click Open … to proceed.
- Next, click the Pencil icon in the top-left area of the screen to open the Capture Details box.
- Supply a Title, Publish to location, and choose whether to live stream the recording or not. The optional fields (description and tag) are searchable and thus make it easy to locate the video in the library. Click Save to proceed.
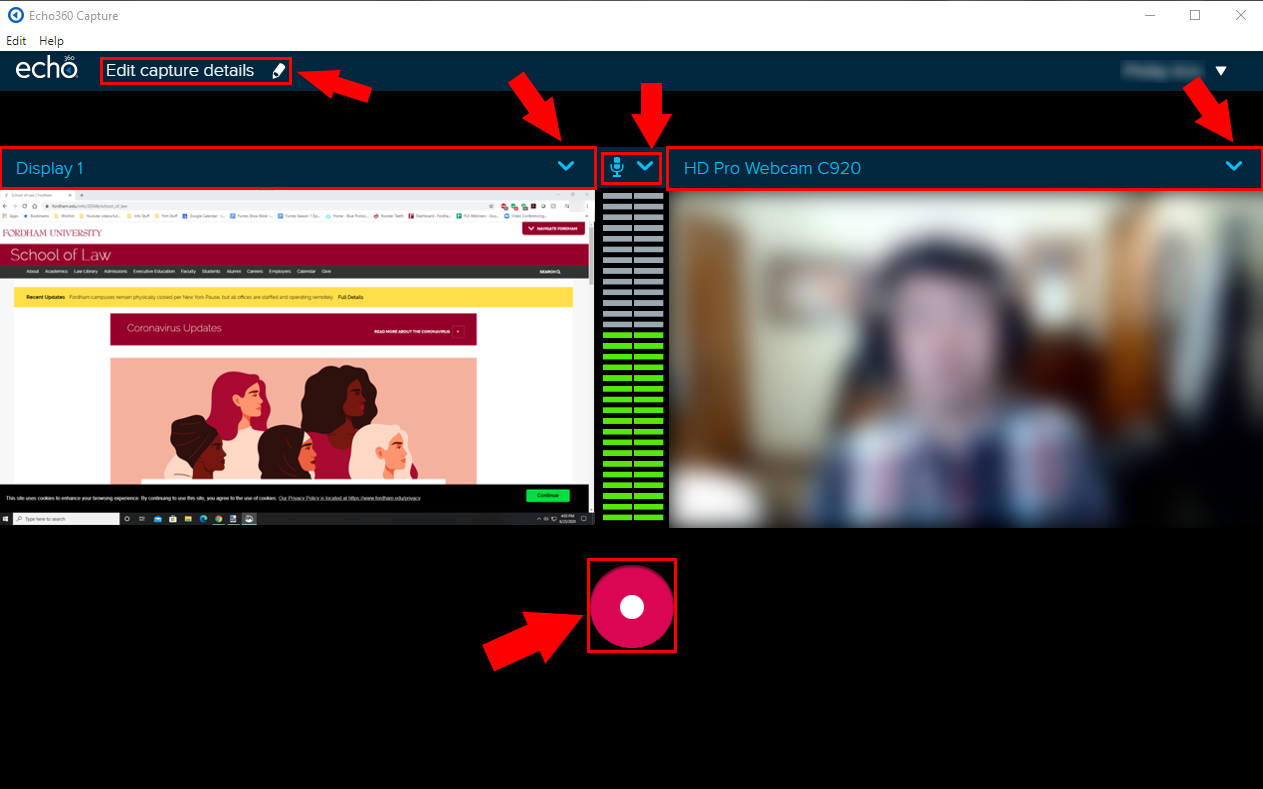
- Continue by selecting from the drop-down lists what to record. Select your built-in or external camera, desktop display, and the built-in or external microphone. Users may select any combination of these but must have audio. For example, to record only your desktop (i.e., a PowerPoint presentation) and voice, deselect the camera and choose your desktop on the right.
- Depending on the inputs selected, you should see audio via a green fluctuating bar, your desktop, and a webcam.
- Click the big friendly red Record button to begin recording.
- Once the recording starts, use the Pause button as needed.
- When finished, click the Stop button to finish and complete the record, at which point Echo360 will begin the uploading process.
![]()
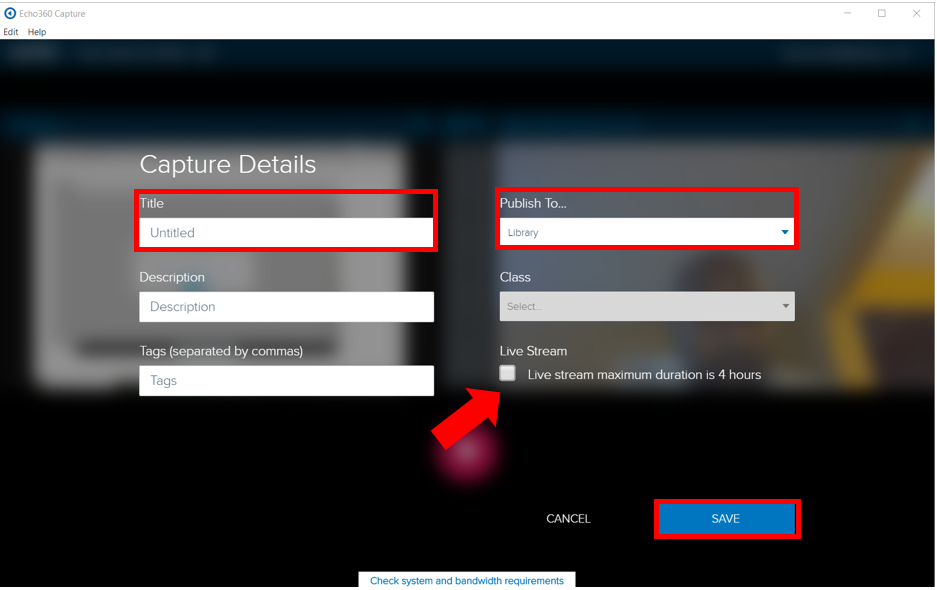
To automatically share the recording with students, select the corresponding course under the Publish To. If you wish to review and edit the recording before sharing it with students, then choose Library.
Note: The Live Stream function, if enabled, will generate a broadcast URL for users to view the recording live. It is a one-way transmission – instructors will not be able to see or hear views of the stream.
Tip: to take a break during a recording, click the pause button instead of stopping the recording. A recording cannot remain paused for longer than 20 minutes.
Below are shortcut keys to control an Echo360 capture:
